My last post was about the restoration of the outside of my C.E. Turnbull house so this post about the inside.
[You can also see the post I made when I bought the house as a restoration project back in June 2017 here and the progress report I made six months later here.]

So here is the [just about] finished interior.
I have to say that, having put my heart and soul into decorating and furnishing this, I absolutely love it!
A very useful tips I was given regarding decorating a dolls' house is to constantly keep in mind the view of the whole of the interior which will be seen when the house is opened up, rather than concentrating solely on individual rooms.
Great advice, but frustratingly I find it's not quite as easy to follow as it perhaps sounds and often a paper or a floor covering looks like it will be just right, but once in place, it really isn't! So there was a lot of chopping and changing in this house before I was happy with the overall 'picture' I'd created - the top right room got its third and [thankfully] final papering less that two weeks ago!

Here is a little reminder of the blank canvas it was when I bought it.
Given that there was literally nothing except the original stairs and doors in the house, I think the interior work would probably be better termed 'refurbishment' than 'restoration'!

A rustic but homely look developed in the kitchen and I've thoroughly enjoyed gathering together all the little accessories which seem to have taken on a bit of a pewter and bisque theme!

As the dining room has filled up, it's become ever more blousy and bling - the flash does actually make the room look much more bling than it does in natural light, but it's never going to be a room you'd hang around in if you felt a headache coming on!
What the occupants really need is a nice big display cabinet for their growing collection of glassware.

To my mind, this gentleman's study/smoking room really improved when I found the right wallpaper border. I used a strip of a plain white anaglypta for the border itself and the blue and red lines around the bottom of it were cut from a length of striped wallpaper.

The parlour has acquired a new rug (the latest of many I've trialed in here over the past couple of years), some nice old lithographed furniture and some gilded accessories.
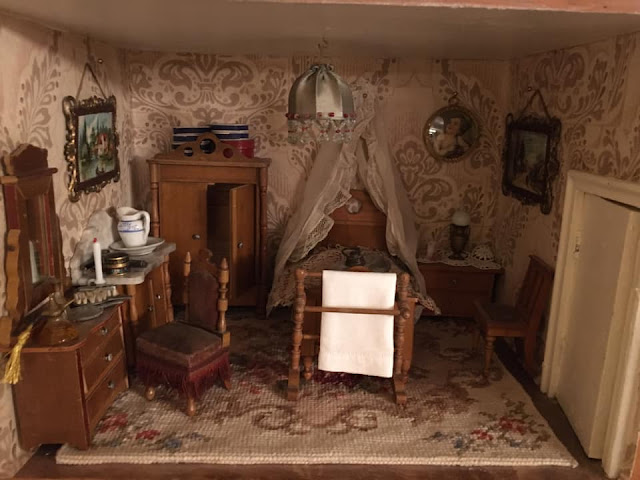
It took me ages to find a wallpaper I was happy with for the bedroom and eventually found this vintage one in Belarus!

Oddly, without the decor decided upon, I was finding it impossible to settle on a theme for this room, however, as soon the decorating was done, the furnishings started to come together and it's now well on its way to being a room for serious study - maybe the children of the house will be tutored in here.

The hallway, first floor and second floor landings.
I've made a few repairs to the stair banisters and balustrades and added a narrower border to the wallpaper on the second floor where the ceiling hight is much lower than on the floors below it.

Apart from the elusive 'perfect' paper for the top right room, the last part of the house to be decorated was the opening front.
The gorgeous old wallpaper I used there had been reclaimed and was in many pieces which had to be patched back together - well worth the effort though as I think they look just right.
I used lengths of antique lace as curtains for the smaller windows and gold Dresden paper trim as valances in the absence of anything more suitable, though I might actually leave them as I like they effect (again, the camera flash makes them look a lot more shiny than they actually are!)

I made the curtains for the bay windows from some very fine antique silk trimmed with old lace. A lovely old lace collar was used for the nets. Fancy antique-look upholstery tacks came in useful to pin some lovely old trim in place as valances and curtain tie-backs.
Only this week, I boxed in the lower part of the bays and installed wooden window sills. Now I'm on a quest to find just the right ornament to place in each window.

I've left the window sills in the bays loose so that there is a little storage area under each one and I've placed the little plastic nameplate that was affixed to the house when it came to me in one of them so it will, hopefully, be kept with the house going forward.
I also plan to add a page of notes detailing the few bits of information I've gleaned about the house and outlining the work I've done to it.
Until next time,
Zoe
This is absolutely brilliant Zoe.
ReplyDeleteThanks, Jenny! x
DeleteOh, Zoe, it's absolutely beautiful! All of it is glorious with so many wonderful 'looks' that there's too many to list; adore the kitchen and much struck by the glow of the red upholstery nestling in its 'bling' setting. All wonderful
ReplyDeleteThank you, Do! x
Delete