I can hardly believe it's almost three years since I posted an update on the restoration of Southsea Villa, my C.E. Turnbull dolls' house from circa 1900.
You can see the post I made when I bought the house as a restoration project back in June 2017 here and the progress report I made six months later here and then nothing for nearly three years!
Well no posts that is, the restoration has slowly been progressing.
And my goodness has this restoration been a challenge! The following is the tale of my 'journey'...
The Outside Papers
When I originally bought this house, I wrote in a post:
"The previous owner had made a start removing the paint, which apparently comes off quite easily with acetone, to reveal the original brick and stone papers underneath; brick at the first- and second-floor levels and stone at the ground-floor level."
Well, I soon discovered that while the paint did indeed come off fairly easily from some areas but, for some reason I can't explain, it was much harder to remove on the left-hand section and it was virtually immovable on the middle section.
There were also areas of immovable white gloss around some of the windows and sections of the papers were missing altogether. In addition to this, all of the papers had absorbed the pigment from the dark red over-paint.
So, after a huge amount of time and effort removing paint, this sorry facade is what I ended up with!
Anyone who has ever attempted this sort of restoration themselves will recognise this stage in the process where you pretty much loose heart and wonder if your efforts have been completely in vain since overpainting or papering seem to be the only sensible options.
Luckily, I didn't do either since I actually couldn't face doing anything more with it at all! So I simply put the front of the house in a cupboard and tried to forget it existed for a while as I got on with the far more rewarding job of restoring and furnishing the interior.
The Missing Bay Windows
Over a year later, I dragged the disheartening facade back out of the cupboard and still couldn't see a way forward. So I decided to turn my efforts to replacing the missing bay windows instead.
All I had to go by were some photos of two other similar C.E.Turnbull houses with bays. Since I had no measurements and no knowledge of how to build such things, I did what I always do in these situations, I cobbled something together the best I could.
I started by drawing myself a very basic diagram of what I was aiming for, with measurements based on the size of the window apertures and guesstimates of the depth and angles of the bays made by scrutinising the photos of the other Turnbull houses.
It was clear that there were two horizontal sections missing from the bottom of the facade, upon which the bays would sit. So my first task was to make those sections by simply drawing the footprint of the bays onto wood of the appropriate thickness and to the size outlined in my diagram, and cutting them out with my mini handsaw.
Next I measured and cut out wood to form the bases of the bays and glued those in place on the horizontal sections I'd made. I had to acknowledge the limits of my meagre wood-working skills and not worry too much about angles and their joins, deciding that I would simply fill in any gaps with wood filler once I'd finished!
Next I cut out and glued wood for the tops of the bays, in the double-layered style I could see had been used on other Turnbull houses.
Then I realised it would be useful to add a third piece of wood to the underside of the tops so that the upright parts of the bay could be attached to it and add stability to the whole bay both before and after it was attached to the dolls' house frontage.
Next I made some upright pieces to join the bases of the bays and the tops together and, as the two photos above show, I constructed the whole bay and glued it all to dolls' house facades all at the same time as it was too tricky to construct the bay without bracing it up against the facade.
This whole process was completely improvised, with much of the contents of one of my kitchen cupboards being employed to achieve the placement I wanted while the glue dried!
After constructing the bays, I added little triangular pieces to the insides of the top corners of the windows to get the same angled effect I'd seen in my reference photos.
The final step was to cut out and glue on a window ledge around the lower part of the bays. I then filled all of the gaps in my dodgy woodwork, sanded down the whole piece to get rid of any new-looking sharp edges and did a bit of wood-bashing with various heavy objects to age it further (not too hard or the whole thing might have dropped to bits!)
I have to admit to being really quite chuffed with the final result, since I have never attempted to make anything as complicated (to an amateur like me at least) as this before and, whilst the symmetry and standard of construction certainly doesn't bear close scrutiny, it's good enough for me!
Restoring the Front Door
Before and after photos above. At some point, the original front door had been replaced by a very plain one, cut with a curve at the top to fit the original aperture. The new door I made is as near to the reference photos as I can manage.
As you can see, I've added a piece of wood at the centre top of the door arch. There was a mark in the paint where something had been attached and I found a photo of a Turnbull house with a piece of wood there, unfortunately it was a very poor photo and I couldn't quite make out exactly what it was, so this is my best guess. I'm thinking it's supposed to represent a lamp above the door, or maybe just an architectural feature. One day I hope to find a better photo and be able to reproduce it more accurately.
I also replaced two missing 'supports' below the little door canopy.
Eventually, I will add a new 'Southsea Villa' nameplate and place the home-made modern-ish one that came with it it in a hiding place in the house that I'll show you in my next blog post.
Inside view of front door. It was clear from my reference photos and the visible evidence of where the original hinges had been, that the original door would have been a larger rectangular one which sat behind the arched aperture (visible from the front) rather than in it, so that's where my new door sits.
The door is simply made from a fairly thick rectangular piece of wood with two thin panels glued on the top half and one on the bottom, with a further elongated diamond shape glued to the bottom panel per my reference photos.
In the absence of original door furniture, I've used a very small antique-style drawer handle or jewellery box handle as a door knocker (I think the original one would have been a lion head with ring through it's mouth similar to those found on Lines and Triang houses), and an old earring as the central door knob. The reverse side of the door is left plain.
Sadly, all the while I was building and replacing the bays and front door, the awful spectre of the dreaded facade papers was hovering and still to be tackled...
The Outside Papers Continued
The state of the papers on the facade was still making me want to weep. So I made a decision to have a go at trying to make them look better, on the basis that anything I did could eventually be covered up if necessary. My reasoning was that at least I would know that I'd tried my best to keep what remained of the original papers on display, even if I failed, which I fully expected to do!
My first task was to tackle the various patches where the paper had been lost. I've seen other restorers simply paint in these sections to good effect. However, after attempting to do this myself, I decided that the bald patches on my facade were too big and I wasn't going to achieve a good enough result.
I decided that the patches needed to be filled somehow to level up the surface, reasoning the at I could then paint and blend them with the paper around them better.
So I created a templates of the bald patches by rubbing over them on a sheet of paper with a pencil and tearing around the edges of the shape produced - always tear rather than cut paper when patching as the edges blend in better (I was given this tip by a fellow collector who has restored his own dolls' houses beautifully).
I was very pleased with how well the shapes fit and blended in the holes in the original papers. I was then able to mix some paint and blend in the patches with the paint around it - a burnt sienna acrylic was very close and only needed a little mixing to blend in well.
As I'd been unable to remove the dark red paint from the narrow central section of the facade, I replaced the entire section with new paper and painted the whole of it.
Since one side of the house facade still looked much lighter that the other side, I gave the lighter side a thin wash of colour to even it up a little. This also served to blend in the areas around some of the windows where I'd been unable to remove the white gloss paint without removing the surface of the 'brick' paper.
I then repeated this whole process on the lower, 'stone' section of paper.
The last step was to continue the black 'brick' and 'stone' lining over the patched sections and this really did help to blend the patches in and create a more coherent facade.
So this is how it eventually ended up and, overall, I am a lot happier with the facade than I was and I'm certainly glad that I didn't paint or paper over it in the end. I'm not one for restoring old houses to 'factory fresh' condition, as I've heard it termed. In my eyes at least, this house is now better to look at than when I bought it but it also retains much of its history, including its battle scars.
Disappointingly, I had a bit of a disaster with the lining on the lower 'stone' paper when I decided that it was too dark - I decided to try to wipe it off and ended up making a mess which you can seen on the righthand side of the photo above. I will get around to rectifying this one day...
The Exterior Woodwork
As the exterior woodwork had been painted over in white gloss, I sanded it all down and repainted it using Farrow & Ball's 'Lime White' Estate Emulsion. I then gave it a very thin, messy wash of burnt sienna to age it - the camera flash makes it look whiter than it does in natural light.
One of the notable characteristics of Turnbull dolls' houses is that some of the edges of the exterior woodwork are highlighted in a pale blue colour, so I added those touches in the appropriate places.
Still To Do
Yes, there is still work to do!
I have yet to repaint the roof, chimneys and the base of the house. I don't think I'll change the colour of the these much as they seem to match the photos of other Turnbull houses I'm using for reference, but I will use matt paint instead of gloss.
And finally, there are the sides of the house. This has been another problematic area. As you can see from the photo above, I have been carefully removing several layers of white gloss paint from the sides and revealing the original bright orange paint underneath. I've been doing this chip by chip of gloss paint using only a scalpel as the original paint is very chalky and is, I feel, likely to be damaged if I use a paint stripper.
However, since I've only recently re-attached the front of the house, it has only just dawned on me that even if I persevere with this painstaking work, the original colour I'm revealing no longer blends harmoniously with the rest of the house.
The photo above shows where I removed a piece of the wood on the facade and the colour of the original brick paper has been revealed. The brick colour was originally a bright orange (much like houses commonly associated with Silber and Fleming). This would have blended very nicely with the orange paint I'm revealing on the sides of the house. However, the facade has been discoloured by pigment from the dark red paint I've removed and it doesn't look at all well with the orang sides.
So, I've recently taken the decision to stop removing the gloss on the sides and to cover them over with a paper which can be painted to match the front. The paper will be easily removed by any future restorer who wants to continue to restore the original paint. I must admit that I'm not a bit sorry to have found this brilliant excuse to stop the mind-numbingly slow paint removal!
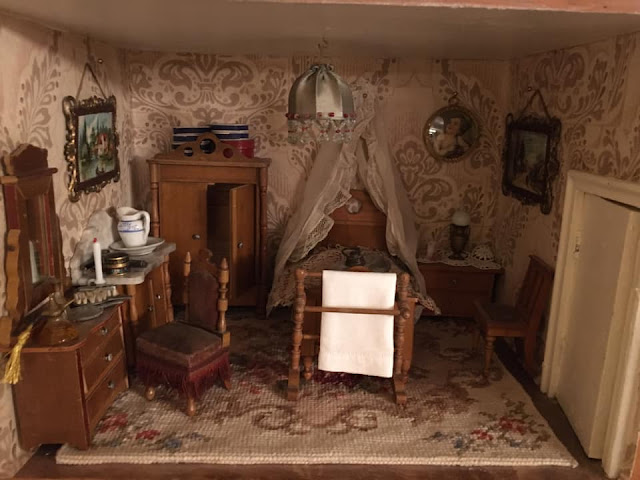
So, that's how I got on and were I'm at with the outside. My next blog post will be a progress report on the inside of the house which, whilst not without its own challenges, was much easier and far more fun to restore, decorate and furnish.
Until next time,
Zoe