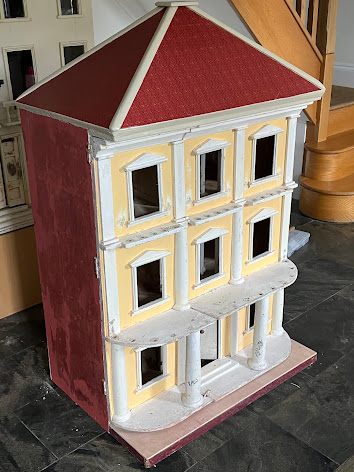
My next job was to tackle the front and I started with a bit of investigation.
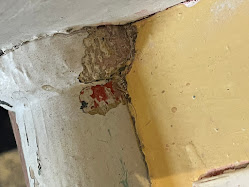
I'd already removed the topmost layer of paint (the bright red one), but a bit more scraping revealed a further three layers of paint on top of the original cream one.
I tried uncovering a patch of the original paint but one of the four layers of paint in particular would not come off with either solvents or scraping and I could see that I was doing more harm than good in trying to remove it. Reluctantly, therefore, I made the decision not to attempt to take the paintwork on the front back to the original.
I experience terrible Restorers' Guilt [constantly questioning if you're doing the right thing and/or a good enough job!] so this decision was not taken lightly.
With restoration of the front ruled out, the plan was to copy the original paintwork as faithfully as possible and to leave what remains of the original paintwork underneath my work for a cleverer restorer to uncover in future (thereby mitigating some of the guilt!)
Two images from the Dolls' Houses Past and Present database of Lines Brothers Tri-ang houses have been fantastic in guiding me with my restoration.
The first is this image of a very nicely restored front.
The owner of that house had stripped a layer of gloss paint off the front to reveal the original paint, brick paper quoining, and gold detailing, all of which are very typical of Tri-ang houses of this period.
I soon found that my house had red detailing on the front and not gold. I must admit that I was a bit disappointed by this as I thought the gold would be nicer, however this image of a DH/5 (the second helpful image from the Dolls' Houses Past and Present database) soon changed my mind as I think that the original red details on it look superb. I also admired the front door and hoped to copy it for mine.
Now I knew what I was aiming at, I started by sanding the bumpy layers of paint to get a flat surface to paint on. This included using a craft knife to remove paint from corners and grooves where it was so thick that the wood profiles were almost obliterated.
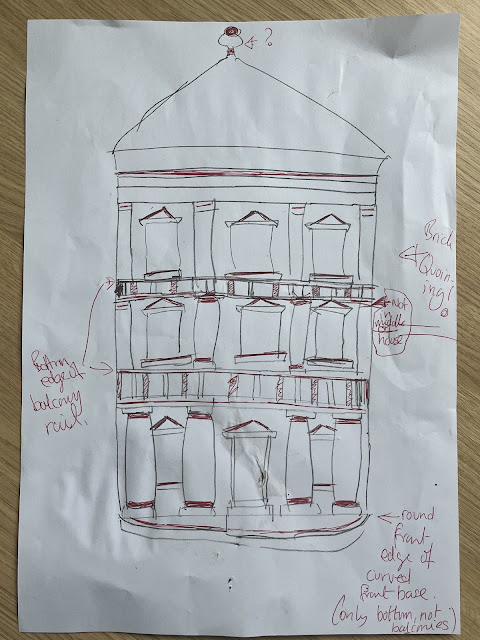
The process also revealed exactly where all of the red detailing was on my house and I my made myself this drawing so that I wouldn't forget (apologies, as I always say, I'm no artist!)
The next step was to give the whole of the front two coats of Farrow & Ball 'Off-White No.3' which I think works quite well as an approximation of the original greyish cream finish. I also used this paint to undercoat the top of the base in preparation for painting it to match the oxblood sides.
I finished the front with a thinned-down coat of Humbrol 'Matt Cote' (half and half paint and thinner). I used the Matt Cote to seal in the emulsion paint which will make the lining a bit easier when I get to that stage (less likely to bleed and also 'wipe-offable' if I make a mistake!)
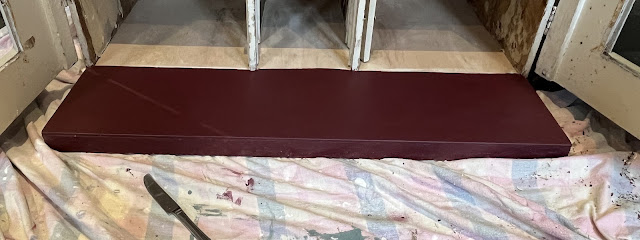
I then gave the top of the base two coats of Farrow & Ball 'Preference Red No.297' estate emulsion which I couldn't be happier with as a match for the original oxblood paint on the sides of the base which I also touched in with it. I finished off the base with a coat of the Humbrol 'Matt Cote'.
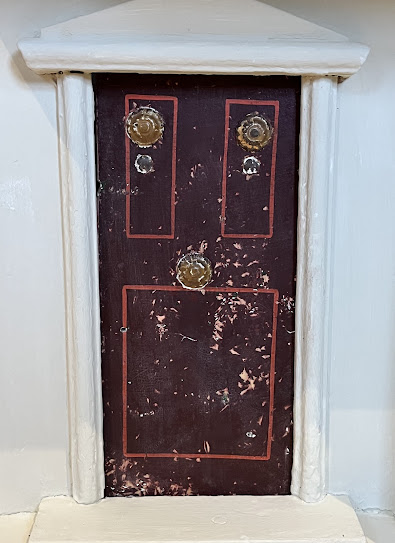
It was while I had the house tipped up to paint the front that I notice that the bottom edge of the house's front door was the same ox blood red as the base.
I was soon chipping away furiously at the white gloss on the door and this lovely door emerged almost in tact. Almost the same door I had so admired on the house in the DHP&P database - I can't tell you how happy this made me. 😁
With a little bit of touching in with the Preference Red, I think it looks great! It does look a bit skew-whiff but a slight adjustment of one of the hinges will sort that out - though being completely honest, I don't like messing with hinges so it will probably stay like this.
One last thing before I finish this post, I mentioned in Part Two of my blog that I was toying with the idea of finishing off the sides of the house with a layer of clear beeswax and I should mention for completeness that I did do so and I'm very pleased with the result.
With clear Briwax applied and polished up to a light sheen, my repairs look much less obvious than they did and the wax gives the paper a protective layer too. I haven't added a photo as the difference doesn't really show up.
Until next time,
Zoe






How wonderful to find the original door underneath the paint. It is a really lovely door.
ReplyDelete